Got a phone call from HD a couple of days later, "You won the grill!"
"What grill?" (Nothing about the giveaway was on the Contact Me box or form.)
"The grill we're giving away to someone who requested a quote for roofing. You can pick it up at the Vinings' store."
I went to the specified store, identified myself, and the wife and I loaded the grill into the back of the truck - after sufficient tightening of the various wingnuts ("no tools assembly") to make the grill stable enough to be picked up (assembly warning #1).
Unloaded the grill when we got home, transferred the LP tank from the old grill, tried to fire it up - the spark lighter did not work (assembly warning #2). Weak, puny spark on the side burner, no spark on the main burners. It did work when lit with a "flame shooter" type lighter.
Having to remove one side of the cooking grill to light the burners got old after a couple of uses, so I decided to try repairing it. The online site for Fiesta grill manuals does not have the manual for this grill - the numbers there only go to 4055 and this grill is a 5555. The manuals for the 4055 series grills show a different burner/lighter configuration.
Careful adjustment of the electrode on the side burner got a spark adequate to light it. Still no joy on the main burners. Time for serious disassembly to find out why the spark lighter that can deliver a 3/4 inch spark can't light the main burners.
|
The interior of the grill, as Home Depot assembled the burners and lighting assembly. Since the lighter assembly / burner bracket is under the burners, there is no way the gas/air mixture can get to the spark electrodes in the assembly. Since the two halves of the assembly are pressed together, the electrodes are also shorted to ground. 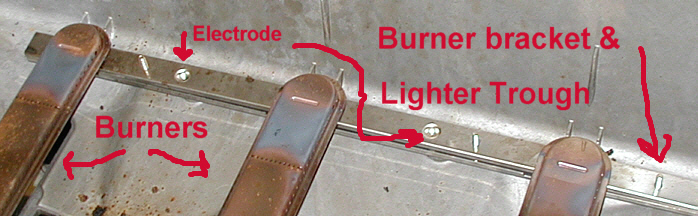
Closeup of one burner and the lighter/bracket assembly. Note the slot in the burner that a tab of the lighter/bracket assembly fits into. Also note that the clamping screws have no nuts on them. 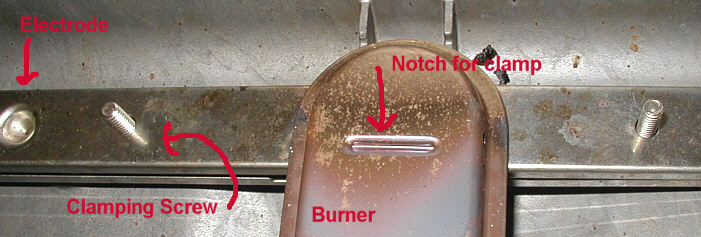
Closeup of bracket with burner in the background. Is it hard to see how this should be assembled? 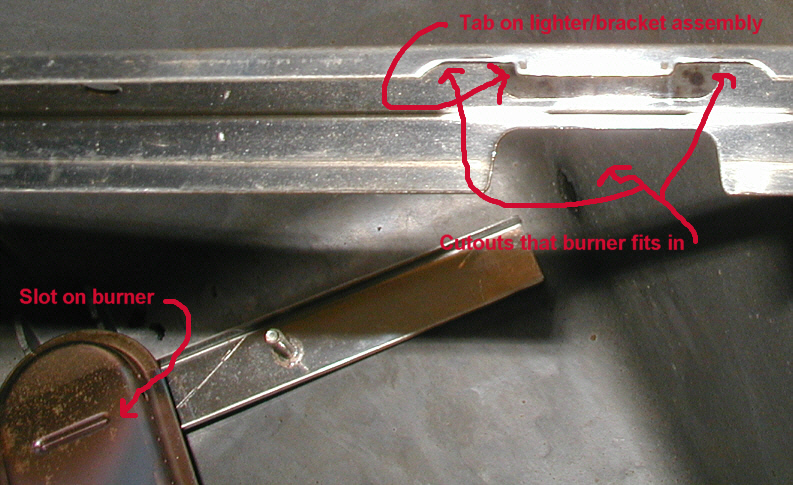
Correctly assembled burner and lighter/bracket assembly - with nuts. 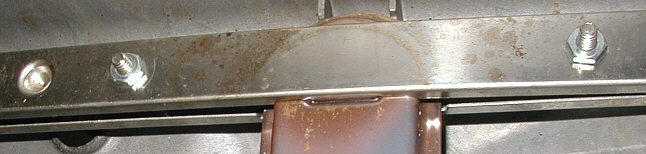
|